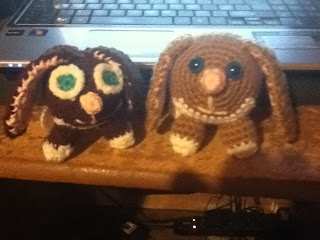
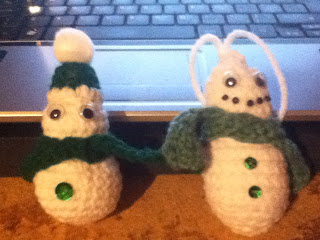
There are a lot of different eyes that you can use without having to buy safety eyes and they aren't the thing to use in every situation. Buttons, felt, googly eyes and french knots can all be used for this purpose depending on the look you're going for or you can even crochet eyes in the round. most of the time though safety eyes are going to give you a more professional look to you amigurumi.
 |
| Googly eyes |
 |
| French knots |
 |
| Crocheted |
 |
| Embroidery eyes |
The Advantage of these kinds of eyes is that they use something you already have, yarn, or something you can easily get. Any Walmart or dollar store will sell googly eyes or buttons but for some people safety eyes are something they can only hope to get online and that can be quite intimidating if you don't know what you're doing.
Yet the look of a piece finished with the right eyes makes things look a lot more professional and clean.
Okay let's start with how to find these eyes. I was able to get mine at Hobby Lobby but there are a lot of them available on different Etsy shops including ones you can paint yourself.
This is my collection of safety eyes and noses.
I have 3 different kinds of noses and 5 different kinds of eyes. By far the ones that I use the most are the 10mm black eyes and I've only ever used the smallest of the noses. Most of my animals tend to be small though if you're making larger animals you'll need large eyes. yes there are some buttons in there too but these ones I've never had a reason to use as eyes and I bought to use as closures on my magic deck boxes.
this is what the eyes look like before you attach them.
The actual eyes looks a bit like a push pin and there are plastic washers that snap on the back. I've heard of eyes that have metal washers on the back but they work the same way.
When using first I like to open up one of the holes between the stitches where you want the eyes to be.
I use a mechanical pencil with the led retracted for this. Keep in mind you're not trying to break apart the yarn itself just widen the space between two stitches. I tend to crochet something very tightly which is good for amigurumi and if you don't do this first you'll have trouble pushing the back of the eye through. this is also really helpful to make sure you have your placement right. You may be able to tell but in the picture above I started putting the eyes too close together and at this point that is an easy fix.
This part is a bit like drilling a pilot hole before hanging something on your wall as it's a tiny thing that will make things so much easier in the long run.
Next you push the back tack part of the eye through these holes until the eye is flush with the front of your work.
This is what that looks like from the inside part of your work. At this point you can still make changes if you're not happy. It will be hard to do so but it's still possible to push the eye out, and move it. you'll have to fuss with the hole you made a little to get it to close but because it is the hole between stitches to start with it can be made to close.
The next step is to add the washer on. For the kind of eyes I have you put the narrow part on first and it may take a little bit of elbow grease to get them on. I've never had one that was too stubborn but it helps if you put both thumbs on either side of the washer to push down.
At this point you're committed to they eyes where they are. If you've made a mistake or you don't like it your only option is to frog the crochet down to where they eyes are, throw the eyes out and start all over with a fresh pair. that's why you make double sure you have them where you want them before you put the washer on. if there are other parts of the face like a nose or a muzzle try to add them before the eyes if possible and make a point to stuff the piece after you put the eyes in but before you attache the washers as the shape can change a lot based on stuffing.
All you have left to do now is to finish off the piece according to the pattern.
If pigs can fly then all of us can master the use of safety eyes.


