Tuesday, November 6, 2012

The eyes have it

I just couldn't resist the pun on a post about working with Safety eyes in Amigurumi.

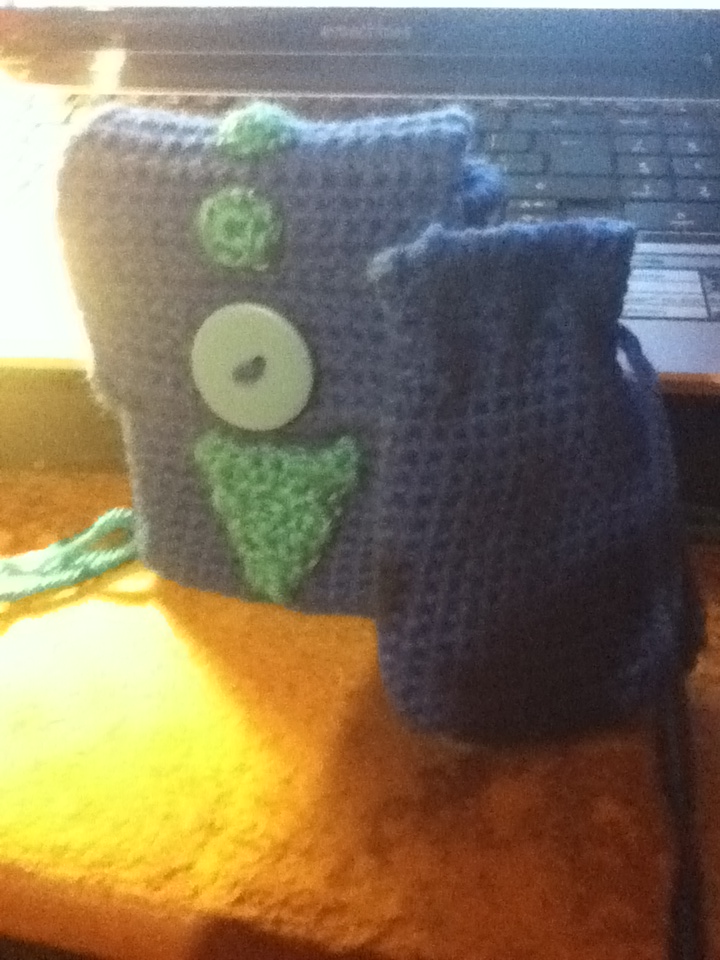
There are a lot of different eyes that you can use without having to buy safety eyes and they aren't the thing to use in every situation. Buttons, felt, googly eyes and french knots can all be used for this purpose depending on the look you're going for or you can even crochet eyes in the round. most of the time though safety eyes are going to give you a more professional look to you amigurumi.

Googly eyes
French knots
Crocheted

Embroidery eyes
The Advantage of these kinds of eyes is that they use something you already have, yarn, or something you can easily get. Any Walmart or dollar store will sell googly eyes or buttons but for some people safety eyes are something they can only hope to get online and that can be quite intimidating if you don't know what you're doing.

Yet the look of a piece finished with the right eyes makes things look a lot more professional and clean.


Okay let's start with how to find these eyes. I was able to get mine at Hobby Lobby but there are a lot of them available on different Etsy shops including ones you can paint yourself. 

This is my collection of safety eyes and noses.


I have 3 different kinds of noses and 5 different kinds of eyes. By far the ones that I use the most are the 10mm black eyes and I've only ever used the smallest of the noses. Most of my animals tend to be small though if you're making larger animals you'll need large eyes. yes there are some buttons in there too but these ones I've never had a reason to use as eyes and I bought to use as closures on my magic deck boxes.

this is what the eyes look like before you attach them.


The actual eyes looks a bit like a push pin and there are plastic washers that snap on the back. I've heard of eyes that have metal washers on the back but they work the same way.

When using first I like to open up one of the holes between the stitches where you want the eyes to be.


I use a mechanical pencil with the led retracted for this. Keep in mind you're not trying to break apart the yarn itself just widen the space between two stitches. I tend to crochet something very tightly which is good for amigurumi and if you don't do this first you'll have trouble pushing the back of the eye through. this is also really helpful to make sure you have your placement right. You may be able to tell but in the picture above I started putting the eyes too close together and at this point that is an easy fix.

This part is a bit like drilling a pilot hole before hanging something on your wall as it's a tiny thing that will make things so much easier in the long run.

Next you push the back tack part of the eye through these holes until the eye is flush with the front of your work.


This is what that looks like from the inside part of your work. At this point you can still make changes if you're not happy. It will be hard to do so but it's still possible to push the eye out, and move it. you'll have to fuss with the hole you made a little to get it to close but because it is the hole between stitches to start with it can be made to close.

The next step is to add the washer on. For the kind of eyes I have you put the narrow part on first and it may take a little bit of elbow grease to get them on. I've never had one that was too stubborn but it helps if you put both thumbs on either side of the washer to push down. 


At this point you're committed to they eyes where they are. If you've made a mistake or you don't like it your only option is to frog the crochet down to where they eyes are, throw the eyes out and start all over with a fresh pair. that's why you make double sure you have them where you want them before you put the washer on. if there are other parts of the face like a nose or a muzzle try to add them before the eyes if possible and make a point to stuff the piece after you put the eyes in but before you attache the washers as the shape can change a lot based on stuffing.  

All you have left to do now is to finish off the piece according to the pattern.


If pigs can fly then all of us can master the use of safety eyes.

Saturday, November 3, 2012

Making a Habbit

I've heard that if you can do something consistently for 30 days it becomes a habit. I've also heard the saying that it takes 6 to stick.

well clearly that's something that I need to try to work on. I know I'm no the first blogger to fall out of posting but I still have to posts rattling about in my head. I've had the pictures taken for my next craft post for over a month now and I've made progress in my weight lost though my original chart is now useless I think.

that's why for the month of November I'm going to try to not miss any posts (well I've already missed the one on the first but I can't travel back in time to that.) For December all bets are off just because of how crazy that time of year is but I'm hoping that.

One thing I have had no trouble at all picking up as a habit is Ravelry. For a crafter of yarn that place is like some sort of digital drug. I've already done the 30 days with that and check it each time i get on the computer to see if new patterns have been added and have stayed up way later than i should have poking around on it.

For any knitter or crocheter out there you need to be on that sight....just be cautious if your stash already exceeds your live expectancy than you're going into a very deep rabbit hole there.

okay so here's to setting good habits and not missing any posts.

Tuesday, August 28, 2012

This little Piggy

Okay now I have done several animals with balls starting as bodies mainly my bunnies and mouse that were mentioned in the post on redoing. This little guy was one of the first ideas I had as I thought he'd be quite easy.


A piglet as it was all one colour and with simple shapes. Snout lets and ears all being modifications on shapes I had used before.

The first thing i did was make the body. I put the safety eyes in when i had it half done. Normally I wait as long as I can to add them so i'm sure where I want them and I know I don't have to redo any of my work. If I was attaching the head to a separate body like on my coke bear I'd attach all the other facial features first and then the eyes stuffing and unstuffing it as I go to make sure you have the shape you want. For a sealed body like this you want to add the eyes while you'r working it but keep in mind that when you put the eyes on they are not going anywhere.


As you can see at this point he doesn't really look like much of anything. you could make a shape like this as a head for a larger doll it's really a matter of what you add to it as this point.


The snout was easy to make. Start with a magic ring. Then you do a round with 2 sc in each stitch. Then two rounds where you have one sc in each stitch. This is how you start off any shape that you want to be tube shaped. You can make them rounder or flatter on the end depending on how you stuff them. For anyone learning how to make amigurumi needs to learn the magic ring or some variation of it. it gives the best finish and keeps you from having a hole at the start from you slip knot.


The legs come next and not surprisingly they are just like the snout only you add more rounds of sc in each st to make them longer. it's good to keep in mind with any piece that you plan to attach to the body to keep a long tail on it after you tie it off. that will give you the yarn you need to attach it.


Remember these from the last post. yes they are the pigs ears and though simple shapes they do have a trick to making them but it makes them useful to make all kinds of ears.

First you make a magic ring again but you'r not going to continue to work in the round after you're done. No you're going to chain one and turn your work. then you put 2 HDC 2 DC and then 2 HDC and tie off. or if you want a similar shape but smaller you do 2 sc, 2 HDC and then 2 sc. The shorter stiches make up the sides of the ear and the taller ones the top.


These pictures show the ears from different views to give a clearer idea of how they are put together.

Last but not least we have the tail.


This was the easiest part. I just made an idiot cord and trimmed it to be a little over an inch and then curled it around itself. I tired different things to make it stay curly such as putting a wire in it but found that it did pretty good on it's as long as the cord was short to start with.

So now my piglet  was done but there's always room to add more. after all a piglet is cute but....


a dapper piglet is ready for a night on the town.

Sunday, August 19, 2012

Pieces

Sorry for yet another long absence but tech issues and other RL issues have conspired to keep me with little free time. I will have a full craft post up on Tuesday for my latest critter creation but I had another project I'm working on that made me think of something else that I've learned as I've picked up crocheting.

That is to think of thinks in pieces.

Learning how to make different animals and characters started with learning how to make basic shapes. balls and cones and rods that kind of things. Really there is only about 6 or 7 shapes you need to learn to be able to lean to be able to make most things. Everything else seems to be layering and linking those shapes and with some practice you'll be able to see the pieces that you need to break things down into.

for example what is this a part of?


or what about this?


it takes a lot of practice to figure out the shapes you need to make but in my experience it's just as teachable as learning the proper stitches. I probably should mention that when it comes to more artistic things like drawing or painting I can't do that at all but I can colour and do paint by numbers and once you learn the shapes you need to make and how to adjust them for different situations you can make what ever you want.

Now as for the above pictures can anyone guess what they are from? well the second one is part of my project that I will have up on Tuesday but the other is a work in progress that I may have to set aside for a while due to needing to get Christmas gifts started and i've had a request for angry bird's plushies from my nephew.

so I'll give you a little hint to what that first one is.


Can you find that shape in this picture. it should be fairly easy.

That's all for me and here's hoping that i get back to doing this regularly.

Friday, July 27, 2012

Remake

I don't supose i have any steady followers yet to have anyone wondering where my posts have been but this has been a trying week as we have a member of my husband's family who has gone into Hospice care and we expect to pass any day now and I've just been trying to support my husband and his parents. My diet is more or less out the window at the momment and i don't have much interesting to say about things in general but I have done some crafting to pass time and i did have something interesting to say earlier so I'm goign to go with that even though it's a thrusday.

I think each thing you make is a learning experence particuly when starting out. I look now at the things I first made and cring at how poor they were. Yet I remember being so proud of thouse when I made them and I know if not for the mistakes i had made along the way the things I'm making now wouldn't be as good.

Yet the temptaion is there to just pull apart the old ones and make them as I could now and most of the time I find it better to just start from scratch and then at the very least I have the two to make side by side comparsions on.

A redo is normally the best option but every now and then it's better to just pull something out if there's one small thing you don't like. You may remember this little guy from a past post.


I'm sure you can guess what i wasn't happy about with him. yes his wiskers.They were too dark, too thick and looked like tendrills coming off his face. I had made them with the wire form a  twist tie that I coated with glue and then wraped yarn around. However the only way i could see to start it was to hold the yarn under and wind aroudn it and  the wire for the first part wich left me with a fat end and a skinny end. Luckly they were easy to pull out and replease.


This one I'm much more pleased with. Doing the wiskers in white made them stand out less and this time  was able to get the yarn tight on both end by meerly coating half the wire, starting in the middle and wraping to the end and when that was set going the other way. Howerver this is not the first mouse I made. This is where the value of side by side comparsion comes in.


The big difference being the eyes, the ears and the body shape. Before I was able to find safety eyes I had to crochet eyes and oddly this was one of my best pairs as they didn't look that big in comparson to the face thanks to the ears. I wanted the ears bigger though to add to the cuitness so I simply made them with a larger hook. They body is thes same pattern worked differently. the first pattern book I got instructed to work only in the back loops witch makes your stiches taller but makes a line sprialing aroudn the outside of your work. Starting out this actually made things easier as it was quite easy to count my rows if I lost track of them by counting the lines. So when I started doing other patterns I assumed they were back looks as well and kept doing that on my own.

It was only later that I started to learn that it it was more common to work in both loops and why and I really did prefer the shape and more fabric texture you get from working in both loops. For my moust that ment a more round cubby body instead of a long thinner one that looked more like a rat. you may also notice i did something different for his wiskers too. On the first one I used black yard, frayed it and then coated each strand in glue. It was messy sticky work and they still droop slightly not giving me the effect i wanted at all.

Another creation that needed a minnor change was this one.


Yes that's a final fantasy Moogle the antena for his pom pom was where I first learned the trick with the wire and the yarn and i didn't care if it was a little thick.  this little guy was my first selfmade pattern  that I was 100% happy with when I made him....or rather about 95% happy with him as there was one small problem.


*cring* for thouse not familar with them Moogles have bat like wings that are tipically drawn in darker blue, pruple or even black. Scolops, or rather concave scolops are nerally imposable to do in such a small scale and to make matters worse the yarn that was the only thing close to the right colour that I had was thick and coarse and kind of rough. This had been my 5th attempt though and any look online showed that most people that made moogle dolls made felt wings for just this reason.

I resgined myself to this being the best I could do and put him aside as finished. Sometime later I find this lovely shade of purple in the clearance bin at Hobby Lobby and when I get it home realize this fine soft thread is the perfect shade for moogle wings. Five more atempts later and:


I don't know if the picture shows it clearly enough how much better this is than the last one though it did take another 5 ateptes to get there but the wing has a much better bat shape now.  Yes I made him a little scarf but just because this little guy is going to be one of my Craft Along donations for the Desert bus for Hope fundraiser and I figured he should were ther Loading Ready run colours for that.

I have two more redo's that I want to show the first is one done at aroudn the same time as the first and second mouse and for much the same reason as I now had safety eyes and wanted to work in both loops.


I have a friend very fond of rabbits and kind of disapointed that she can no longer keep one as a pet do to alergies. So when I first started to make patterns on my one making a bunny was the clear choice. I did learn a lot though, his eyes are really the same size as the ones on the first mouse but they look so much bigger due to not haveing the big ears above them and the front view of the ears being quite small. From that I knew I could get away with bigger eyes on the mouse then I could with the rabbit and used two different sizes.

My last picture for this post is of a simple something I made. A snow man christmas ornimant. This one is not my original pattern but i did modify it a bit but the orignal pattern can be found Here.


The original one on the right came out a bit more pointy than I wanted and...well frankly to me atleast looked more like a festive turd than a snow man. They guy on the right came out all round and jolly so I made him a little hat with and over sized pompom. I just wish I had some fluffy yarn to edge the hat in because using the same white I crochet the snow man in doens't give the contrast I wanted.

So what do you guys think? have these improvements been woth the extra work and the ability to be able to see how far I've come since i started?

Friday, July 20, 2012

Trending down

Okay this is going up later than i thought it would but today seems to be full of constant interruptions but I should be getting this one written the same time as the Saturday one so that shouldn't continue.

As of right now I've been on my "diet" for almost a month and I've only gotten two weigh ins and so far things are looking quite positive

<iframe width="500" height="300" scrolling="no" frameborder="no" src="https://www.google.com/fusiontables/embedviz?viz=GVIZ&t=LINE&containerId=gviz_canvas&isXyPlot=true&q=select+col3%2C+col1+from+1UtjSmLGA0yFQi_ZGbpg_r4rAEQD5W7o6KJEMv9M&qrs=+where+col3+%3E%3D+&qre=+and+col3+%3C%3D+&qe=+order+by+col3+asc+limit+2&width=500&height=300">iframe>

As this graph shows I've lost 2 pounds and am down to 239.2. the problem being that I know full well that statistically that 2 pounds doesn't mean that much and it's possible that i haven't really lost any real weight. It could just be fluids and likely is as I've tried to cut out a lot of processed (ie salty) foods.

Frankly i would be surprised if I had lost more than that as right now I've only made minor changes to make things more manageable.

The first thing I've done is tried to cut back on my portion sizes. Most of the time I don't need seconds and if I am feeling still a little peckish I'll only take seconds of veggies. Oddly though a strange thing seems to be happening that when I eat less I feel more satisfied with the food I did eat. It seems so much of our modern world is built on excess and I've found that a lot of times I can over eat without even realizing it. I'm not starving myself by no means but listening to my body more about when I'm full and not assuming I have to finish everything on my plate because it's there even if I'll make myself sick doing so.

The second thing I've started doing is grazing more. In the past I know I've just had two big meals and that's it. I'm making a point to have breakfast even if it's just a yogurt or a few almonds and two to three sensible snacks a day. Little bags of popcorn, granola bars, nuts, fruit and if I want to really treat myself a small bowl of animal crackers as they have no where near the sugar or fat as other cookies and can be quite filling.

When it comes to drink it's something I haven't had too much trouble with. I don't like water but i do like crystal light and other sugar free drink mixes and I'm not a huge fan of sodas of any kind or alcoholic drinks so it's not much to cut those out but for as a rare treat.

One thing I have been having trouble with is exercise as I leave a very stationary life and something like a gym membership is simply out of my budget right now. I have been doing simple things to try to move a bit more. when I get a drink I only get a tiny amount then I have to get up and get more sooner or later. I also worked up quite a sweat dealing with the water leakage from the AC and that has motivated me to try to get my home organized. I have so much crud around the house that I don't need and never use just collecting dust and i do need to go through it all and get ready for a garage sale.

Well just to finish this on another recipe I have another simple one for a good snack that will make you feel like you're totally cheating. Hehe.

Chocolate Mouse (It's like a Moose only lighter)

- 2 boxes of sugar free chocolate pudding mix I tend to use the Jello kind but store brands work too they need to be sugar free though and i find you can't really taste that big a difference.
- 4 cups 1% milk (or 2% if you don't like 1% I don't taste a big difference between the two but don't use whole or skim milk. one has too much fat, the other is white water masquerading as milk)
- 1 tub of cool whip (light or sugar free)

Mix together the pudding mix and milk either with a hand mixer on low or a whisk. It will take 1-2 minutes for everything to be blended and lump free. A fork or spoon could be used too but it's more likely that you will have lumps. (or you could make in a big container with and air tight lid and shake the daylights out of it to get it mixed good. Fun job for the kids to do as long as you know it won't leak)
Stir in the cool whip with a spoon or the whisk but be a little gentle with it.
Spoon into individual serving cups or a nice serving bowl (if you didn't make it in the serving bowl) and chill in the refrigerator for at least an hour but preferably overnight.
Perfect for family or Church gatherings and any pot luck particularly if there are diabetics in the group. it makes quite a bit so if you want you can half the recipe and then use the other half a tub of cool whip to put on top of the cups.

Wednesday, July 18, 2012

Live delay

Now this has been a week that I'd love to take back. Though I suppose in the end it was a productive week just not productive on the things I had planed and wanted to do. The first thing that went to the way side was blogging then crafting and then my diet went out the window due to having no energy to make real food and then my husband brings home donuts and McDonald's on two different days.

Ironically this problem would have been nothing if we had seen it earlier though i don't suppose that's really ironic as most problems are that way. The problem being that gunk had built up in our AC unit in the bed room and had made the condensation it made not drain out onto the ground but into the window. The problem being we didn't notice right away as there is a desk and short book case in front of that window. It was only when the water seeped through the carpet to the front of the case the we were able to realize what a problem we had. cleaning the gunk out of the AC wasn't that hard as the hose did wonders with it  but the mess made in the house was another matter. It's only today that the carpet is dry and there was a huge amount of work involved in getting the book case moved to a new part of the room and all the papers sorted and organized. The latter had needed to be done for some time and always got put aside as it was always a self contained pocket of clean clutter.

So yes  was productive in getting that off my to do list and I'm likely going to move some other things around to keep this from ever happening again and may even look into steam cleaning the carpet because it feels rough after being damp.

The only crafting I've gotten done around all this was putting my finishing touches on my Desert Bus craft along items which I now have bundled up to ship and putting the pieces together on this little guy.


Yup that's a Coke bear with a crocheted coke bottle. I'm quite pleased with how he's turned out. This particular bear is a gift for a friend as I'm likely going to make a lot of Christmas gifts this year or at least part of the gift if I do buy something else.

This coming week should see the posts going back to normal with something going up on Thursday about my diet getting back on track.

Tuesday, July 10, 2012

Idiot Cord

Okay I have a simpler craft idea today as it's something that is useful in many different aplications. I've used it to make tails on both crochet and plastic canvas animals I've used it for simple straps or ties on bags or for super easy book marks or friendship bracelets. They are called idiot cords becasue any idiot can make them though when showing them to kids I've called them friendship cords as they are more fun to make in pairs particuly for a long one. The pictures I have today are showing how i made the tail of this little guy:

Mr. Wiskers my baby mouse

Idoit Cords are made with two pieces of yarn and for Mr. Wiskers I used two grey pieces but you can also make an interesting combination by doing two different colours. For my gingerbread man ornimant I mad his bow out of red and white yarn to give a candy cane look.


Firt cut your yarn to the size you need. It will need to be double the lengeth you need atleast and it's usually best to make it even longer than that as you will loose some lentght to your knots and triming. also try to make the pieces the same length or very close to the same length.

If you cord will be on something like my mouse or if you're making a book mark with a charm on the end thread that on and put it in the middle. With a Mr. Wiskers I had to use a needle to put each thread in the right place and the you tie the ends together with a simple square knot making sure your strangs are even with each other and your item is in the center or very close to the center.


Both pieces of yarn are in place and tied evenly

Next you need two objects like pens, something you can slip in betweein the strings and will hold them. I used a crochet hook and a mecencal pencile but straws, utensles, chopsticks, markers or in a real pinch fingers can do this but I find it's easiest with something that has a little hook or nib on it like the part on a pen that will hook on your pocket.


And then you just twist one in each direction so that the yarn starts to twist together. i don't have any pictures of this step as i needed both hands to do it and couldn't work the camera as well but it's not hard to do at all particuly on a short piece like this. However for something longer that's when an extra pair of hand can come in handy or in a pinch i have held one end between my toes and done all the twisting on one end. You can do that though it takes a litle longer. Keep twisting untill the two strands are tightly wound together. This should only take a minute even for a long string. When iyou're don't twisting you bring your pens together while pulling the middle down.

This is what it should look like now

 Then you simply let go of the middle while holding the two ends and it will wind up on itself in a few seconds creating one idiot cord.

Almost Finished cord

Then all you have to do is carefully slide the pens out. Tie a not in the end of the cord and make sure it's past the first knots you tied and then trim off the excess simple as that.


What you wind up with looks like it was braided or woven somehow but the yarn does most of the work when it twists up on itself. Quick easy and versitile something you can use to make a tail for a baby mouse or a friendship braclet that you and your friend made together.


Sunday, July 8, 2012

You haven't seen.....

Well this one is going up much later than I wanted to mainly because I've been without power for most of the afternoon and evening. 

Saturday is my day for random musings that pop into my head and perhaps from time to time extra craft or health posts. Today i want to talk about the oddity of the words "I can't believe you haven't seen..." usually followed by some movie or TV show.

Really there is nothing out there that everyone has seen so it shouldn't surprise us but I don't know how many times I've uttered those words myself or had them uttered to me.

Today's word is one of sub-sub cultures and there are very few things no mater how popular or good that are truly universal. As a child growing up my sister loved the Princess Bride and we watched that movie to the point that we both had it memorized. For me the thought of someone not having seen that movie is just bazaar. Watership down was a favorite movie as a child that only got better as an adult as I could appreciate it more and after reading the book. Yet when I learned that my movie buff and general geeky husband hadn't seen it i was shocked. I lamented this fact to a mutual friend of ours who as a general rule loved all the same things that I did and she had never even heard of the movie or the book.

It can get even worse for TV shows I grew up in Canada and my husband in the US. Some of the shows he remembers fondly I'm quite sure were never shown back home or at least not on a station that we had. I get the strangest looks trying to explain things like Mr. Dressup, the Beachcombers, the Littlest Hobo, The adventures of Tintin or even more recent stuff like This hour has 22 minutes or Just for Laughs.

Of course this can be something of an opportunity because I've noticed that though this might happen a lot when you're dealing with something very common or popular most of the time when you say it is because you know that this is something that this person would like. I couldn't believe that my husband hadn't seen Schindler's List because he is a movie buff and a history buff. To list all the movies he's exposed me to because he couldn't believe i hadn't seen them would have me here all day

"I can't believe you've never seen this." may be a strange thing to say as logically no one can see everything even all the things they might wind up loving if they did see it. But keeping watch of when you say those words is a pretty clear gauge of what is important to you, the media that didn't just entertain us but became a part of our lives.

Well i don't know if that made sense to anyone but me but to finish up I'm going to put an update on the diet progress. I have been able to get a 9volt battery and now have functioning scales though I was not pleased with what they wound up telling me and want to insist that they are broken.

My starting weight for this endeavor is 241.2 which is easily the heaviest I've been in my whole life as normally I've only been around 200-210 but I knew from how I was feeling that things couldn't be right. So now my first goal is to get back under 200 preferably by end of the year. Once I reach that goal I'll set a second one though i think my ideal weight would be 140-160. I am a short woman at 5'1" and this weight is making it hard to move, hard to sleep  and I have no energy. I dont' really want to try to reach a certain dress size or anything like that because this is not about how i look but how i feel. the numbers don't really matter as much of how i think I'll feel if I can hit them. If i never make it to 160 but i can get in a shape where I can sleep good and have energy and am not hurting all the time then I'll be happy with that.

Thursday, July 5, 2012

Best laid plans

Well this post is going up much later than I  wanted though still on Thursday.

The plans for this post were to go over my starting point in terms of weight and health before going into what changes I managed to do. First I needed to get my current weight. Only the battery is dead in my scales. (yeah I haven't really been using them so the battery was likely wore down for some time.) As we tend to have AA and AAA around the house i was hopeful that we had the right battery only to open it up and find that it was a 9 volt battery. No one keeps 9v in the house because it seems like almost nothing uses them any more.

So i went out shopping for batteries and could only find the 9v in a back of 8 that cost around $15. I wouldn't pay that when I only needed one battery and it would be cheaper to buy a new scale most likely. I've never understood the reason that we have so many different kinds of batteries and 9v seem particularly useless as I'm sure the job could be done just as well by 2 or even 4 AA.

So this post is not a total waste I'm going to talk about a few healthy choices that I did make when shopping that I'm hoping are steps in the right directions. Particularly since they deal with my biggest down fall:

Snacks.

First thing I did was not even go down the chocolate, candy and cookie aisles. I know I have weakness with those things and if I saw them I'd get a chocolate covered something or other with a million calories in it.

The first thing I picked up was some Cocoa roasted Almond. Now chocolate almonds was something I liked but didn't love as a child. When Hershey had the Christmas story books of three candy bars and my friend would always give me her milk chocolate with almond as she was allergic to nuts. I'd break it up to get the nuts and eat them first then savor the chocolate, the good part. However as an adult chocolate covered almonds have become a favorite of mine to the point that guy at the concession of our local movie theater knows that's what I want every time i come to the movies.

However what I got today is not chocolate almonds but almonds with a light dusting of cocoa powder. they have little fat or calories and almonds are full of all kinds of good things for you. not only that but a handful really does full you up and make you want to snack less.

The second snack I got was first for the nostalgia and second for the health. Blueberries. I grew up in an area where the late summer and early fall has blueberries growing all over the place wild. I have fond memories of picking the berries with my sister and parents. Of sitting in a blueberry patch with my cup to put my berries in. One berry for the cup, one for me, On for the cup, two for me.  when my cup was finally full I'd dump it in the bucket that my parents had half full by now and go right back to things with even less berries winding up in the cup.

Well i plan to finish each of these with a light recipe that is simple to make and thinking of blueberries made me think of one of my old childhood favorites

Blueberries, Milk and Sugar

Ingredients:
     - Blueberries (about 1 cup)
     - Milk (about 1/4 of a cup)
     - Sugar or low cal. sweetener to taste

Put berries in a bowl then pour milk in until just vi sable through the berries. Lightly sprinkle with sugar until you get it to your taste though you don't need much as the berries have a lot of natural sugars. Eat like cereal.

Yes I know that his is a super easy recipe, almost like something a child would make and it is that simple and more delicious than it has any reason to be. Antioxidant rich blueberries with 1% milk and a touch of splendia or even sugar is a light snack that will make you feel like a kid again. Or at least it does for me.

Tuesday, July 3, 2012

card box

For my first craft post I have something that I'm working on for the Craft along for Loading Ready Run's Desert Bus for Hope which is an event that raises funds for Child's  Play. It will be my first year donating an item to the craft along.

The thing I'm showing you today is how I made a crochet deck box for Magic the Gathering cards but it could also hold cards for any colectable card game and the principlas could be used to make any size box.

This was my fist atempt at the patern:


It was a good start but the bottom was messy and saggy and it was hard to get the cards in and out though i did learn a lot form it such as how to make the button hole just the right size for an inch sized button and to be be careful with your decoratons. This one is suposed to have two falling leaves on it but I think I may be the only one that sees that. Though it is better than the first accent I did as I made the leaf rounded on one end and added a stem and cross ribs and my husband thought it was a tenis racket.

So back to the drawing board I went knowing I needed to find a new way to do the bottom. Most of my work so far with crochet was with amigurumi which had you working in the round and spacing your increases around the row so doing that had seemed logical to me but that is the wrong way to do a rectangle as I soon learned.


First you start with a chain I started with only 6 ch stiches but depending on the size you're going for you can have more or less. A general rul of thumb though is that the more stiches you start with the wider the base is going to be compared to the depth you want. Stich both sides of the chain for the first round and then make sure you can pick out your 4 corner stiches. for the rest of the rounds in the bottom you're going to put 3 Single crochets (SC) in the corners and one in each other stich. Keep going untill you get the size you want making sure to mark the first stich of eavh new round. I use plastic stich makers I got at Hobby Lobby for a few dollars but you can mark it with a contrasting piece of yarn but i find that two easy pull out by accadent and loose your spot. the plastic ones will not come off unless you want them to but as a draw back I've broken a bunch of them while opening them to take them off. In fact the red one in the picture above broke one round after that picture was taken.


When you have the bottom the size you want you may notice some visable holes in the middle where you worked both sides of the chain and you have the starting end of the yarn. So with the wrong side facing up thread the end on a tapastry or darning needle and kill two birds with one stone.


Weave your needle in and out of the holes making sure that you come back up on the wrong side and then weave the end into your work and cut off the excess.


This is what the good side of your bottom will look like when you're done. Now continue on working one SC in each stich up the side. For a staight sided box like this you're going to want to cintinue doing this untill the box reaches the desiered hight. For a box this side it will likely take 18- 20 rounds depending on your gauge but you're going to want to pause after you have a few rows done.


When you have a few rounds done you want to put a suport in the bottom. I used plastic canvas because I had it on hand and because the holes had an added purpose (more on that later) but you could use card stock or even cardboard as with somethign this high it's not goin to really be visable. if the bottom will be visable try using something like a card. or magazine cover. Having the suport in the bottom will help the piece keep it's shape and it will help you tell if youre gauge is right or not. If you're making something like this where it needs to be a percise size this lets you know while you still have only a little done if you've gotten things too small or too big. If the size is not inporant just make sure the suport is trimed down so that it doesn't poke out the corners.

Once you're happy with that and have worked the box to the high you want it's time to finish the edge. If you want an open box this is your last step.


The reverse single crochet or crab stich is not hard though it does feel ackward to do particularly the first time you do it. I find that not only does it give a nicer looking edge though it makes it more dureable and less likely to fray wich is a win-win. I only did it along the two short sides and the front though as I was still goign to need to work on the other side to add the flap.


this part is actually quite easy as it's just doing sc in rows doing a chain and a turn at the end of each row untill you have it almost long enough and it's time to add the button hole. I knew from my past experments for my button size I need a 4 stich hole so SC as normal untill you get to the middle 4 stiches of the row.


So you just make a Ch of 4 skip over the middle 4 sitches and then crochet as normal the rest of the row. You'll wind up with a hole that looks like this:


For you next row work all the stiches including the chain stiches. Continue untill you get the flap to the length you want then finish with a revers SC like you did for the top edges. Then tie off your yarn and weave in the end. Attach the button using the hole to help you figure out where to put it. The box is now done unless you want to do even more extras.


I made a simple movable divider out of plastic canvas simply cutting it to size and overcasting the edge in the same colour yarn. i left the bottom nubs on the piece though as you can see in the picture above wich is not normally you do with plastic canvas but doing this allows the nubs to catch in the holes of the plastic canavas suport I put in the bottom so that the divider will stay in place and not slide about.


Above you'll see the box with cards in it. The first box shows 60 cards in sleaves with plenty of room on the other side of the diveder for another 40 cards.


And here we have the finished deck box decorated with the Loading Ready Run logo and the matching draw string back to hold conters and dice to go with it. the bag isn't finished yet though as it still needs to have to logo on it too and I need to find a better string for the draw string part. I have a normal piece of yarn through there now and had plan to just use a simple yarn idot cord untill my husband pointed out that would quickly fray. So I'm goign to need something a bit more durable but I haven't found anything yet.